How did you use media technologies in the construction and research, planning and evaluation stages?
Technologies Used For Planning:
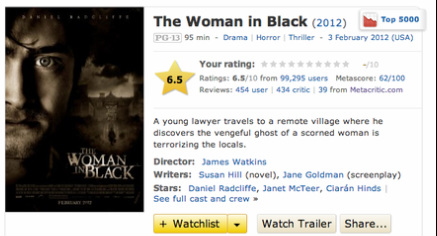
We used sites such as IMDB to research about successful films.
We noticed that the film 'The Woman In Black' (2012) had a similar idea to ours as it based in victorian times. This is simliar to ours as our trailer features a victorian maid. Similarly both our trailer and The Woman In Black have a woman who has died and come back for revenge.
This site was extremely useful as we were able search the site by gender and we were able to see the most recent horror films and which films were the most successful and had the highest rating. This was important as we were able to see which ideas we should use for our trailer and what was the best genre of horror to use.
Mindmap Of The Technologies used:
Green Screening:
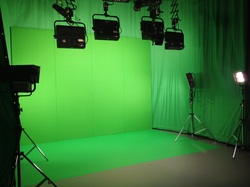
We used green screening when talking about the lighting we used in our trailer. We used this so we could talk about what was going on with the lighting whilst playing a shot of it happening.
When editing it we used the 'Keyer' tool in order to remove the green. We changed the size and position of ourselves and overlaid it on top of the clip of the lighting in order to show what we had done. This was very easy to use, when clicking on the 'Keyer' button and it removed the green for us.
When editing it we used the 'Keyer' tool in order to remove the green. We changed the size and position of ourselves and overlaid it on top of the clip of the lighting in order to show what we had done. This was very easy to use, when clicking on the 'Keyer' button and it removed the green for us.
Technologies Used For Construction:
Final Cut:
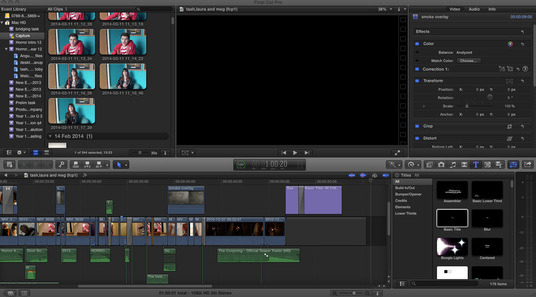
We used 'Final Cut Pro X' in the construction stages of producing a trailer.
This means we can crop our clips to the size we want them and overlay sounds and text to make them more effective.
With this programme you can edit the effects on the clips, and use different transitions.
We first uploaded all of the clips we had taken onto our library on the programme. We then dragged the clips that we thought we wanted in our trailer onto the timeline. Before editing them and cropping them down we moved them around into the order we thought would look best. When we had done this we then found a soundtrack that we thought fitted our clips an genre. After finding this we edited clip by clip, cutting each one down and adding the effects. We then added in the titles we thought would be best and where they could go. To finish it off we found extra little sound clips which we could add to our timeline to make our trailer look more effective.
Pic Monkey:
When first looking at the effects we could use on Pic Monkey we found the red blood effect which you can see on the picture below, when clicking on it we realised that you could change the direction that you wanted it to go in, we thought to the side looked the most effective. We then took off the blood so we could edit Megan's face and body the way we wanted it, we wanted her to look glamourous so we could contrast it with the blood on the page, this helped portray that something bad was going to happen to an innocent girl in our trailer. We then added this photo onto Photo Shop and added on the extra effects and titles.
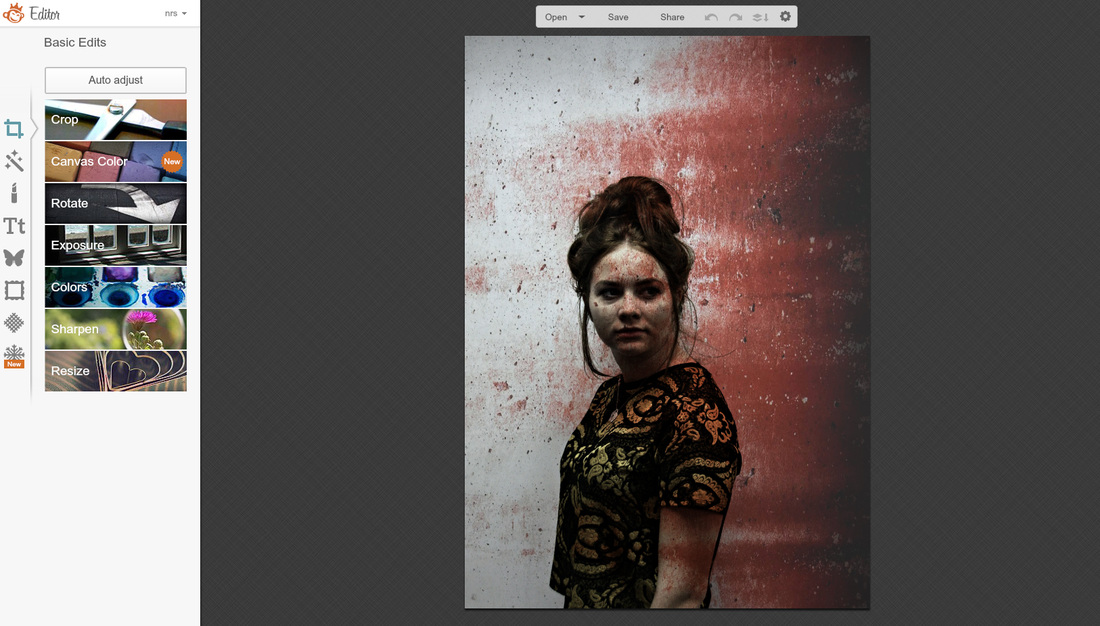
Photo Shop:
We used Photo Shop when making our poster and magazine. On the magazine we used Pic Monkey to create the main background of our magazine (shown above), and then used Photo Shop to add on the extra effects and texts. However we used Photo Shop to make the whole of the poster.

On Photo Shop we put on the titles and barcode using the text tool and different text types. We changed the colour and the font in order to make the magazine look more effective. We added in the thumbnail pictures by using the selection tool and dragging over the photo that we wanted.
Below is a slideshow of pictures to show the stages we went through in order to create our poster.
1) Meg as a maid
2) Smashed glass we wanted to overlay the picture of the maid
3) A normal picture of Meg that we could cut up to make the smashed glass
4) The polygon laso tool which allowed us to cut out glass shapes
5&6) Bevel and Emboss and drop shadow effect that we used to make the cut out sections look more like glass
7) The smashed glass brush we used to give our poster the finishing touches
8) Our final poster
Technologies Used For Evaluation Stages:
We used a PREZZI to show the websites we used during the process of answering our evaluation questions.
Prezzi and Screen Casting:
Prezzi: We used Prezzi in both the planning and evaluation stages, this was in order to show our journey that we went through to get to our final piece, for example the plots, the props and the cast. We also used Prezzi in the evaluation stages to show what technologies we used in the evaluation stages. We showed how we used Prezzi through Screen Casting.
Screen Casting: We used Screen Casting to show how we used Prezzi, Screen Casting is when you record what you are doing on the screen, then you can put it onto Final Cut and edit the video.
Screen Casting: We used Screen Casting to show how we used Prezzi, Screen Casting is when you record what you are doing on the screen, then you can put it onto Final Cut and edit the video.
Final Cut:
We used Final Cut Pro 10, in the evaluation stages when making the video on question 1, this was so we could compare our clips with similar film trailers. This worked well, we added music, titles and clips to show this. We also used Final Cut when editing the Screen Casting we did of us using Prezzi, this meant that we could add our own music and cut out the bits that we didn't need.
